Introduction: Why Choose Miro vs Competitors
Welcome to our comprehensive Miro beginners guide! This powerful visual collaboration platform might seem overwhelming at first, but with this Miro beginners guide, you’ll be creating impressive boards in no time. Whether you’re a Scrum Master, team member, or project manager new to the platform, this Miro beginners guide will help you navigate the interface and start collaborating effectively.
Getting Started with our Miro Beginners Guide
Creating Your Account
- Visit Miro.com and click “Sign Up Free”
- Enter your email address or sign up with Google, Slack, or Microsoft
- Verify your email if needed
- Complete your profile with your name and basic information
Understanding the Dashboard

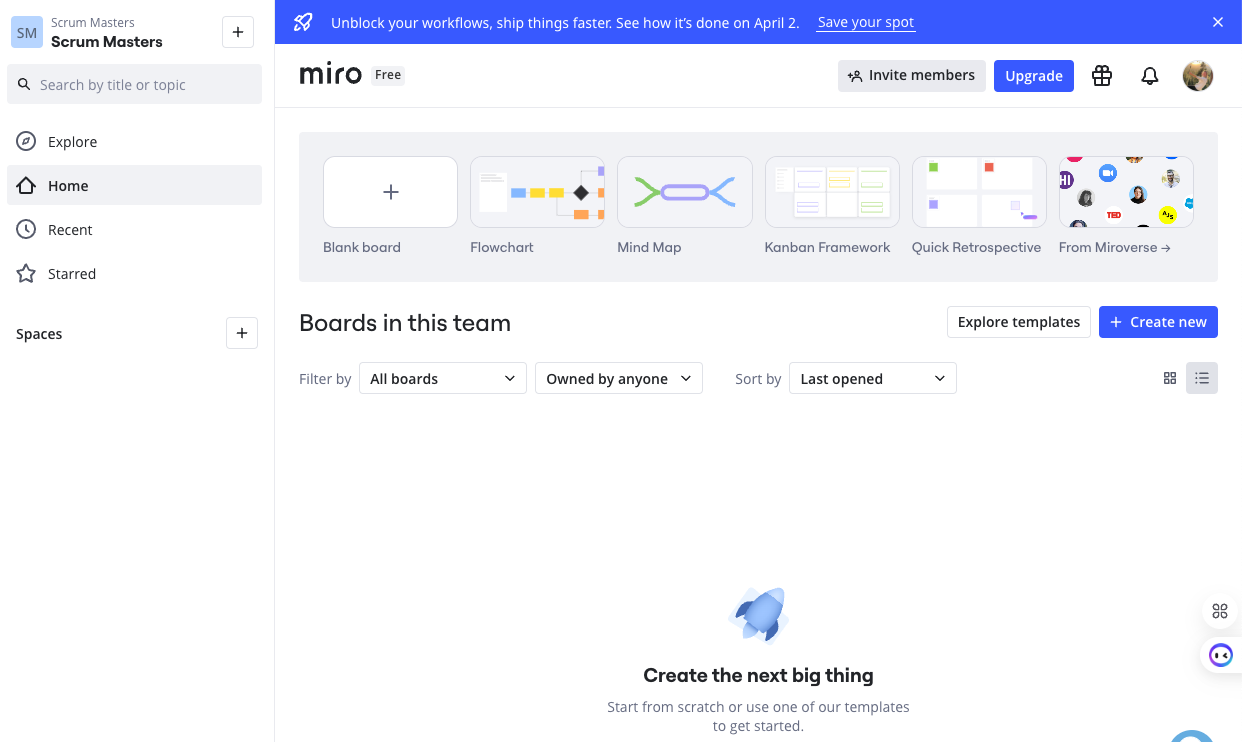
This Miro beginners guide starts with the absolute basics. After logging in, you’ll see your dashboard with these key elements:
- Left sidebar: Access to your boards, templates, and team spaces
- Main area: Your recent boards and those shared with you
- Create button: The large “+” button to start a new board
- Top navigation: Your profile, notifications, and settings
Creating Your First Board: Miro Beginners Guide Essentials
Starting a New Board
- Click the “+” button from your dashboard
- Choose “Create a board” or select from templates
- Give your board a name (you can change this later)
Understanding the Canvas
Once your board opens, you’ll see:

- Infinite canvas: The white space where you’ll add content
- Toolbar: On the left side with tools for adding elements
- Navigation panel: At the bottom for zooming and moving
- Collaboration panel: On the right to see team members
Essential Tools for Beginners: Miro Beginners Guide Core Features
1. Basic Navigation
Any Miro beginners guide would be incomplete without explaining basic navigation:
- Pan: Hold spacebar + click and drag (or middle mouse button)
- Zoom: Use the scroll wheel or pinch on trackpads
- Zoom to fit: Press “Shift+1” to see the entire board
- Mini-map: Use the bottom-right corner to navigate large boards
2. Adding Content
From the left toolbar, you can add:
- Sticky notes: Click the note icon and then click on the canvas
- Shapes: Select shapes like squares, circles, or arrows
- Text: Add standalone text fields by clicking the “T” icon
- Connectors: Create lines connecting elements with the line tool
3. Working with Sticky Notes
Sticky notes are Miro’s bread and butter:
- Create: Click the sticky note icon and then click on the canvas
- Change color: Select the note and use the color picker at the bottom
- Resize: Drag any corner of a selected note
- Add text: Simply click on a note and start typing
4. Organizing Content
Keep your board tidy with these features:
- Select multiple items: Drag a selection box or hold Shift while clicking
- Align items: Select multiple items and use the alignment options in the bottom toolbar
- Group items: Select multiple items and press Ctrl+G (Cmd+G on Mac)
- Create frames: Use the frame tool to section your board into distinct areas


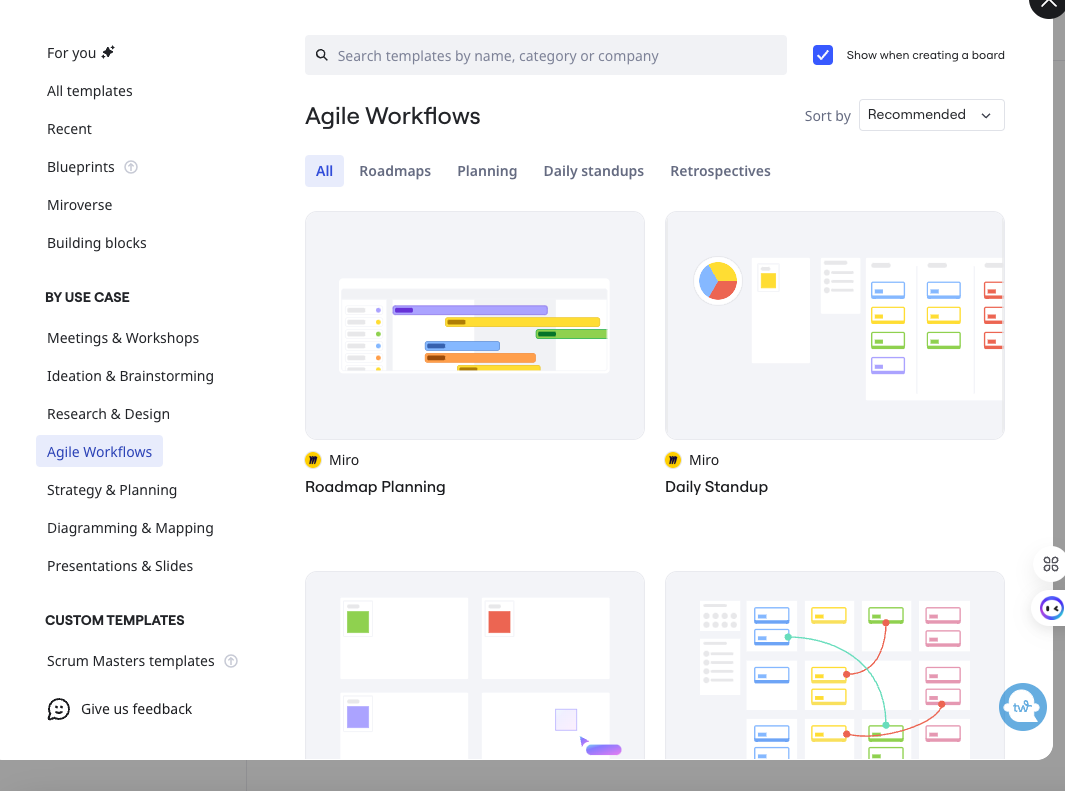
Templates: Your Secret Weapon in this Miro Beginners Guide
Finding the Right Template
- From your dashboard, click “Templates” in the left sidebar
- Browse categories or use the search function
- Preview templates before selecting
- Click “Use this template” to create a board based on it
Popular Beginner Templates
- Simple Kanban Board: Track work with To Do, In Progress, Done columns
- Meeting Notes: Structured space for capturing meeting information
- Retrospective Board: For team reflections with Start/Stop/Continue sections
- Mind Map: For visual brainstorming and idea organization
Collaboration Basics
Inviting Team Members
- Click “Share” in the top-right corner
- Enter email addresses or copy the invitation link
- Set permissions (Viewer, Commenter, or Editor)
- Add a personal message if desired
Real-time Collaboration
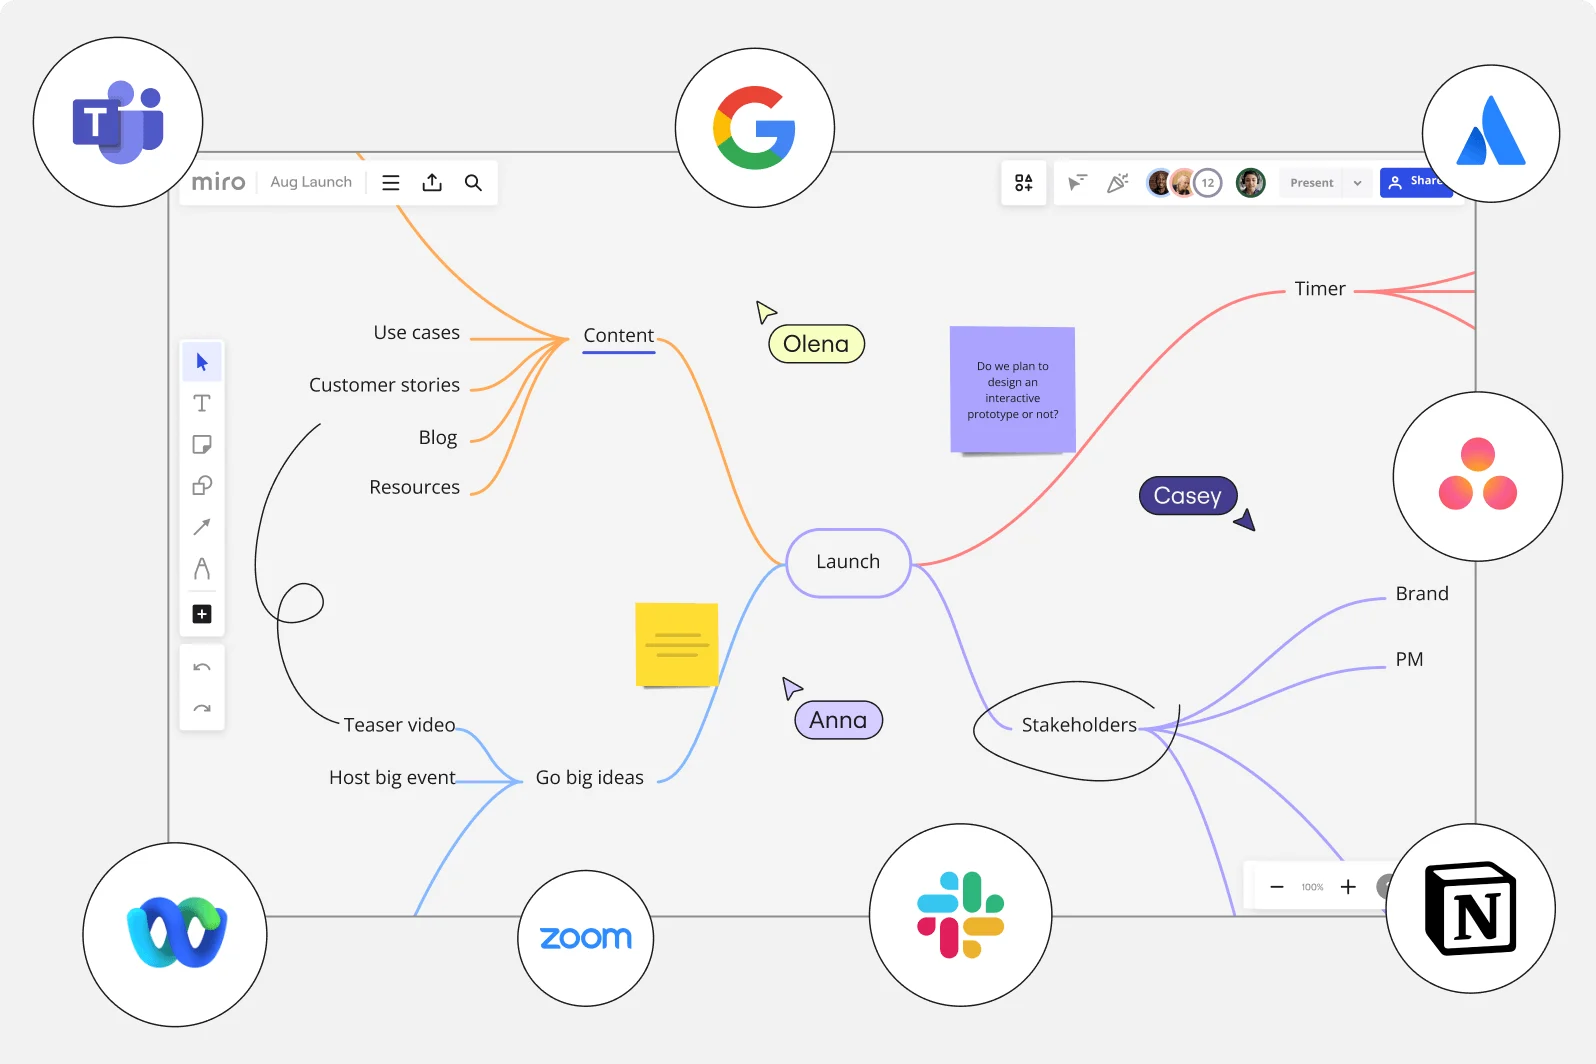
- Cursors: See everyone’s cursors with their names
- Follow mode: Click someone’s avatar to follow their movements
- Comments: Add comments by selecting an element and clicking the comment icon
- Reactions: Use emojis to react to ideas quickly
5 Quick Tips for New Users
- Use keyboard shortcuts: Press “?” to see all shortcuts
- Save regularly: Miro autosaves, but you can press Ctrl+S (Cmd+S on Mac) to ensure changes are saved
- Try presentation mode: Click “Present” to focus attention during meetings
- Use timer: For time-boxed activities, click “Timer” in the toolbar
- Explore the Miroverse: Find community-created templates via “Templates” → “Miroverse”

How can I use Miro?
See how Miro transforms remote retrospectives compared to competitor tools.
Common Beginner Mistakes to Avoid: Miro Beginners Guide Troubleshooting
- Creating overcrowded boards: Use frames and organize content
- Forgetting to set permissions: Check sharing settings before collaborative sessions
- Working without a plan: Use templates or plan your board structure
- Ignoring the minimap: Use it to navigate large boards efficiently
- Not using frames: Frames help organize content and facilitate presentations
Next Steps After Mastering This Miro Beginners Guide
Once you’re comfortable with Miro’s basics, explore:
- Advanced templates: For specific methodologies like SAFe, Design Thinking
- Integrations: Connect with tools like Jira, Asana, or Slack
- Custom templates: Create and save your own templates
- Facilitation tools: Voting, timer, and attention management features
- Apps: Extend functionality with Miro Marketplace apps
Troubleshooting Common Issues
Board Loading Slowly
- Reduce the number of high-resolution images
- Split very complex boards into multiple boards
- Check your internet connection
Can’t Edit Elements
- Verify your permission level (need Editor access)
- Make sure the element isn’t locked
- Check if someone else is currently editing it
Changes Not Saving
- Check internet connection
- Look for the “Saving…” indicator
- Try refreshing the page if needed
Getting Help Beyond this Miro Beginners Guide
- Help center: Click “?” icon in the bottom-right corner
- Community forum: Access via Miro website to connect with other users
- Support team: Contact through the Help center for technical issues
- Tutorials: Watch video tutorials in the Help center
Conclusion: Mastering Miro with our Miro Beginners Guide
Miro becomes intuitive with practice, and this Miro beginners guide has covered all the essentials to get you started. Begin with simple boards and basic elements before advancing to more complex features. Remember that the true value of Miro comes from collaboration and visual thinking, not just from technical mastery of the tool.
With this Miro beginners guide, you’re ready to begin your journey to becoming a Miro expert. Happy collaborating!
Pro Tip: Bookmark this Miro beginners guide or keep it open in a separate tab while you explore Miro for the first time. Refer back to specific sections as needed during your learning process.
Looking for more? Check out our advanced Miro guides once you’ve mastered the basics in this Miro beginners guide.
Q: What exactly is Miro and what problems does it solve?
A: Miro is a digital whiteboard platform designed for visual collaboration. It solves the challenges of remote/hybrid team collaboration, visual planning, and interactive workshops by providing a flexible canvas where teams can work together in real-time regardless of location.
Q: How many people can collaborate on a Miro board simultaneously?
A: Miro supports up to 100 simultaneous editors on a single board without performance degradation, making it suitable for large-scale workshops and planning sessions.
Q: How does Miro integrate with Jira and other agile tools?
A: Miro offers two-way integration with Jira, allowing you to create, view, and update Jira issues directly from Miro boards. It also integrates with Confluence, Azure DevOps, GitHub, Asana, and Monday.com among others.
Q: Can I run a full PI Planning session in Miro?
A: Yes, Miro is excellent for PI Planning. It offers specific SAFe PI Planning templates and features that support program boards, team breakouts, dependency management, and confidence votes—all in one place.
Q: In the Miro vs competitors comparison, how does Miro compare to physical whiteboards for retrospectives?
A: When comparing Miro vs competitors including traditional physical whiteboards, Miro offers significant advantages: permanent digital record, ability to use templates, anonymous contributions, built-in voting, and full participation from remote team members.
Q: When comparing Miro vs competitors, what’s the typical ROI timeframe for teams adopting Miro?
A: In Miro vs competitors ROI comparisons, most teams report positive ROI within 3 months of adopting Miro, compared to 6+ months with competitors. Time savings come from streamlined meetings, reduced documentation effort, faster decision-making, and improved asynchronous collaboration.
Q: Does Miro offer training or certification for teams?
A: Yes, Miro offers both free and premium training options. Free resources include webinars, documentation, and the Miro Academy. Enterprise customers receive dedicated onboarding sessions and custom training.


40 thoughts on “The Ultimate Miro Beginners Guide: Master Visual Collaboration”
Пропаганда vs. Slava Mexx & Misha Plein & Dj Romantic – Не Аленка (Dj Serzhikwen Mash Up) скачать песню и слушать бесплатно https://shorturl.fm/WyOVL
Josй Feliciano – Never Gonna Change скачать и слушать песню https://shorturl.fm/d24Qh
http://wish-club.ru/forums/index.php?autocom=gallery&req=si&img=5433
https://myteana.ru/forums/index.php?autocom=gallery&req=si&img=6797
http://toyota-porte.ru/forums/index.php?autocom=gallery&req=si&img=3402
https://hrv-club.ru/forums/index.php?autocom=gallery&req=si&img=7179
https://hrv-club.ru/forums/index.php?autocom=gallery&req=si&img=7136
https://honda-fit.ru/forums/index.php?autocom=gallery&req=si&img=7294
https://myteana.ru/forums/index.php?autocom=gallery&req=si&img=6671
https://vitz.ru/forums/index.php?autocom=gallery&req=si&img=4867
https://honda-fit.ru/forums/index.php?autocom=gallery&req=si&img=7096
https://honda-fit.ru/forums/index.php?autocom=gallery&req=si&img=7096
http://passo.su/forums/index.php?autocom=gallery&req=si&img=4266
http://wish-club.ru/forums/index.php?autocom=gallery&req=si&img=5290
https://hrv-club.ru/forums/index.php?autocom=gallery&req=si&img=6962
http://toyota-porte.ru/forums/index.php?autocom=gallery&req=si&img=3281
Awesome https://is.gd/N1ikS2
Very good https://is.gd/N1ikS2
Awesome https://is.gd/N1ikS2
Good https://is.gd/N1ikS2
Good https://is.gd/N1ikS2
Very good https://is.gd/N1ikS2
http://passo.su/forums/index.php?autocom=gallery&req=si&img=4304
https://myteana.ru/forums/index.php?autocom=gallery&req=si&img=6835
Very good https://is.gd/N1ikS2
Very good https://is.gd/N1ikS2
Good https://rb.gy/4gq2o4
Awesome https://rb.gy/4gq2o4
Awesome https://rb.gy/4gq2o4
Very good https://rb.gy/4gq2o4
Very good https://t.ly/tndaA
Very good https://dub.sh/LAqZ3qv
https://honda-fit.ru/forums/index.php?autocom=gallery&req=si&img=7128
https://vitz.ru/forums/index.php?autocom=gallery&req=si&img=4898
Good https://shorturl.at/2breu
Good https://shorturl.at/2breu
https://vitz.ru/forums/index.php?autocom=gallery&req=si&img=4894
https://myteana.ru/forums/index.php?autocom=gallery&req=si&img=6619
https://honda-fit.ru/forums/index.php?autocom=gallery&req=si&img=7034
Hi zaidi na forum gde obshalisa kak budesh otpishi Lichku ya Lera 22 goda naidesh menya ” форум общения ” знакомства
” samoe glavnoe eto pomosh, esli hot nemnogo ushe budet volna .”